
Unit 12


To make the doll I first drafted up a pattern to work from, the fist one turned out a little too small so I made a bigger one. Then I cut out all of the pieces and sewed around the edges, after that I stuffed all the separate parts and hand sewed them together. I found the head was a little floppy on its own so I used an old paintbrush as a sort of spine, which seemed to work nicely. For more detail, look at the 'Since we've been back from Christmas' blog post.


For making the skirt I used a YouTube video to work out the right measurements, cut out a circle and hemmed the edges. After doing that I pinned it to the doll and pleated the excess at the back, then sewed it directly on so it would stay in place. I then made the shirt by making a pattern first and figuring out what looked best, I tried to make the outfit as close to Betty's as I could but I didn't know about the yellow belt until after I was finished. Once the shirt was on I stitched a belt around the middle to hide the seams.


Once I had sewn on the belt in the middle I made a little hat and added pleats around the edge to make it a bit puffy, then I sewed that to the head. After that I painted the face on, I used acrylic paint for most of it and chalk pastel to put the blush on. Once that was done the doll was finished.


To make the wedding cake I cut varying sized circles from cardboard for the different layers, once I was happy with the size of the cake I hot glued the layers together and mod rocked over it. While the mod rock was drying I used clay to create the lines and drops of icing. Once everything was dry I hot glued it all on and went over it with white paint. After that I just added some flowers I found, I would have liked more of them but they were the only ones I could find.


For making the smaller doll I started by making a mock up for the outfit, using a barbie as a model. The top was fine so I cut out the correct pieces for that right away, however the skirt had to be changed to be longer for the top layer and have a circle skirt underneath. This was to allow for the sand pouch in the back.


Making the skirts wasn't too hard, although I did have to hand sew most of it as it was all too small for the machine. The pleats were probably the most annoying part to sew on the top layer of the skirt but it didn't take too long and the bottom layer was just a circle skirt. The shirt was a lot more difficult as I had to make puffy sleeves on such a small scale.


Making the body was easy, I used the same sort of technique as the bigger doll. The face and arms for this doll were different, I used polymer clay to make them which was easy enough but I'm not that good at humanoid things so they weren't perfect. Once they were baked I painted them, and superglued hair onto the head. I used a rat tail comb and straighteners to curl the hair.


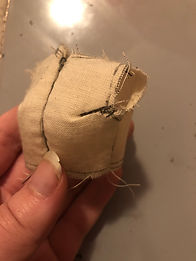
The first sand pouch I tried didn't work, the actor couldn't find the string to pull to release the sand. To fix this I put in a zip that could be undone and the doll could be tipped upside down to let the sand out.

